Learning how to do a Dutch braid by yourself might seem intimidating at first, especially when looking at polished styles online. However, once you understand the structure and flow of this timeless braid, it becomes much easier to recreate. Unlike a French braid, the Dutch braid stands out by crossing sections under each other rather than over. This technique creates a raised braid effect that adds texture, volume, and elegance.
For those seeking a style that transitions from casual errands to formal events, the Dutch braid is ideal. It keeps your hair neat, works well with different textures, and holds up through the day. In addition, you don’t need expensive tools—just clean hair, a few clips, and some patience. With the right mindset and consistent practice, you’ll be weaving this signature look with confidence and flair.
Tools and Prep: What You’ll Need Before You Braid
Before diving into how to do a Dutch braid by yourself, it’s important to start with clean, detangled hair. Brushing through thoroughly eliminates knots and helps create smooth, consistent strands. If your hair is too clean or slippery, use a bit of dry shampoo or texturizing spray to add grip. For those with layers, applying a lightweight styling cream can also prevent shorter strands from escaping mid-braid.
Next, gather your tools: a rat-tail comb, sectioning clips, a mirror (ideally two—front and back), and a set of hair ties. In addition, have a few bobby pins ready in case you want to secure loose ends or tuck the braid into a bun or updo. Preparing your space and materials in advance will eliminate frustration and allow you to focus on form and technique rather than hunting down a missing clip mid-style.
How to Do a French Braid Like a Pro
Therefore, thoughtful prep is key. With everything in place, you’re ready to begin your Dutch braid journey with confidence.

Step-by-Step Instructions: How to Do a Dutch Braid by Yourself
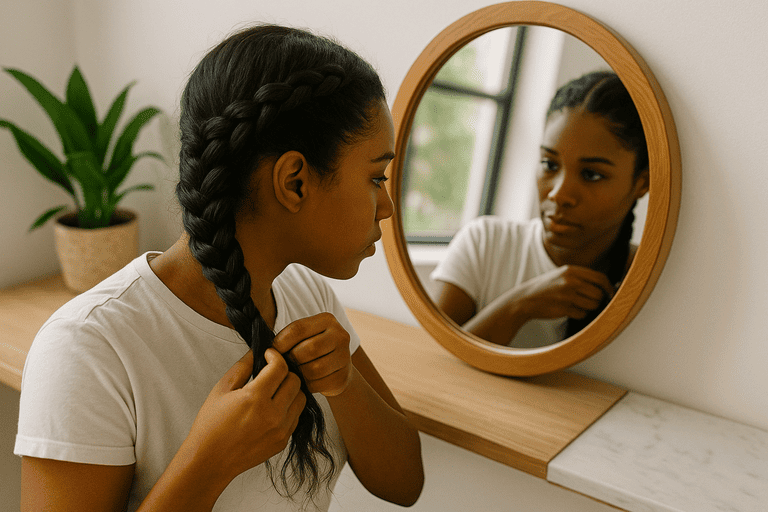
Now comes the fun part—how to do a Dutch braid by yourself, step by step. Begin by parting your hair down the middle or side, depending on your preference. Then, take a section near your hairline where you want the braid to start. Divide that into three equal strands.
Here’s where the magic begins: instead of crossing the outer strands over the center, cross them under. Start by taking the right section under the middle, then the left under the new center. After one full rotation, begin adding hair from the sides before each cross-under. Keep your hands close to your scalp and the sections tight for a clean look.
In addition, consistency in tension is essential. If one side is too loose, the braid may look uneven or collapse. Continue adding and braiding until you reach the nape of your neck, then switch to a regular three-strand braid and secure it with a tie. If you prefer a looser, more bohemian look, gently pull at the loops to pancake the braid. Practice truly makes perfect—each attempt will get smoother.
Common Mistakes and How to Fix Them
Many beginners experience frustration when first learning how to do a Dutch braid by yourself, but small tweaks can make a big difference. One common issue is uneven sectioning. If the strands are not the same size from the beginning, the braid can twist or look lopsided. Use a rat-tail comb to create clean, symmetrical parts before starting.
How to Do a Fishtail Braid: Step by Step Guide
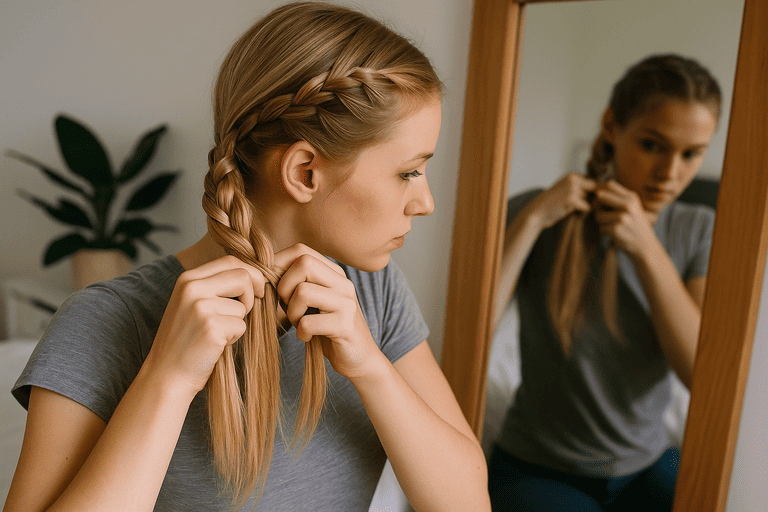
Another challenge is keeping your hands in the right position. If your arms get tired or your elbows drop, the braid tends to sag or flatten. Take short breaks or practice with just the top half of your hair until you build endurance. In addition, working in front of a double mirror setup helps you monitor your progress in real time.
Mistakes are part of the learning process. Therefore, don’t give up too quickly—an imperfect braid today leads to a flawless style tomorrow. Make small adjustments and note what improves your results.
Styling Variations Using a Dutch Braid Base
Once you’ve mastered how to do a Dutch braid by yourself, you can unlock a wide range of creative hairstyles. For example, double Dutch braids are perfect for high-impact gym looks or outdoor adventures. Simply start two braids on either side of your head using the same under-cross technique and secure them at the nape.
In addition, Dutch braid crowns and halo styles work well for weddings, festivals, or romantic evenings. You can also wrap the braid into a low bun or pin it across the back for an elegant updo. These variations only require small changes in your starting point or direction but yield dramatically different results.
The beauty of the Dutch braid lies in its versatility. From edgy to refined, it’s a tool that enhances your styling range without needing heat or harsh chemicals.
Best Hair Types and Lengths for Dutch Braiding
Although almost anyone can learn to braid, certain hair types respond better to Dutch braiding. Medium to long hair provides the most flexibility, as you have more length to work with. Fine hair can achieve volume with the right products, while thick or curly hair holds the braid well without needing additional texture spray.
Straight hair offers a sleek, polished braid, but may require product to prevent slipping. For those with layered cuts, using small elastic bands or bobby pins helps secure shorter strands. Regardless of texture, once you’ve mastered how to do a Dutch braid by yourself, you’ll be able to adjust the process to fit your unique hair type.
How to Put My Hair in a Bun Step by Step
In addition, extensions or clip-ins can add length or volume if needed. Customizing the braid to suit your natural hair ensures better results and builds confidence in your styling abilities.
Time-Saving Tips for Busy Mornings
We all have mornings when time is limited but looking put-together still matters. With a little practice, you can execute a Dutch braid in under 10 minutes. One trick is to prep your hair the night before—apply light mousse and braid loosely to create texture. The next morning, you can quickly re-braid and go.
For ultra-speed, braid only part of your hair. A half-up Dutch braid is stylish and efficient, giving structure to the front while leaving the rest free-flowing. In addition, keep your tools organized in a pouch or vanity tray so you’re not scrambling to find essentials.
Once you feel comfortable with how to do a Dutch braid by yourself, it becomes a reliable option on even your busiest days. Over time, it may become your default look for work, errands, or casual events.
Accessorizing Your Dutch Braid Look
Once you’ve nailed the technique, elevating your braid with accessories adds personality and polish. Ribbons, decorative pins, or even tiny flowers can transform a basic braid into a boho masterpiece. For formal events, try wrapping the braid in a metallic cord or weaving in strands of faux pearls for extra elegance.
In addition, barrettes at the base or midpoints of the braid can add flair while keeping layers in place. Choose accessories that match your outfit, mood, or occasion, and don’t be afraid to experiment. When you understand how to do a Dutch braid by yourself, styling becomes a form of self-expression.
Accessories are the finishing touch—small but powerful additions that turn a practical braid into a fashion statement.
Taking Care of Your Hair Post-Braiding
Even protective styles like Dutch braids need proper aftercare. After removing your braid, detangle your hair gently using a wide-tooth comb. Don’t rush the process—start from the ends and work your way up to avoid breakage. Use a light leave-in conditioner or nourishing serum to restore moisture.
If you braided while your hair was damp, ensure your strands are fully dry before tying them up again. Repeated braiding without breaks can put stress on roots, so give your scalp time to breathe. In addition, sleeping on a silk pillowcase can reduce friction and maintain the health of your hair overnight.
Maintaining your hair before, during, and after braiding helps you enjoy the style without compromising your hair’s health.
Quick Recap
Let’s revisit everything we’ve covered in this complete guide on how to do a Dutch braid by yourself, tailored for readers who want beauty, practicality, and style in one technique.
We started by understanding what sets the Dutch braid apart: its underhand technique, bold texture, and versatility. Then, we walked through the prep process—detangling, adding grip, and organizing your tools. You learned step-by-step how to section, braid, and secure your hair with consistency and control.
We tackled common mistakes and offered ways to troubleshoot them, followed by styling variations like double braids, updos, and crown braids. You also explored which hair types work best, time-saving hacks, accessorizing ideas, and post-braid hair care. All of this reinforces one truth: learning how to do a Dutch braid by yourself empowers you to look your best anytime, anywhere.
With practice, patience, and creativity, this classic braid becomes part of your style toolkit—a look that adapts to your personality and life.